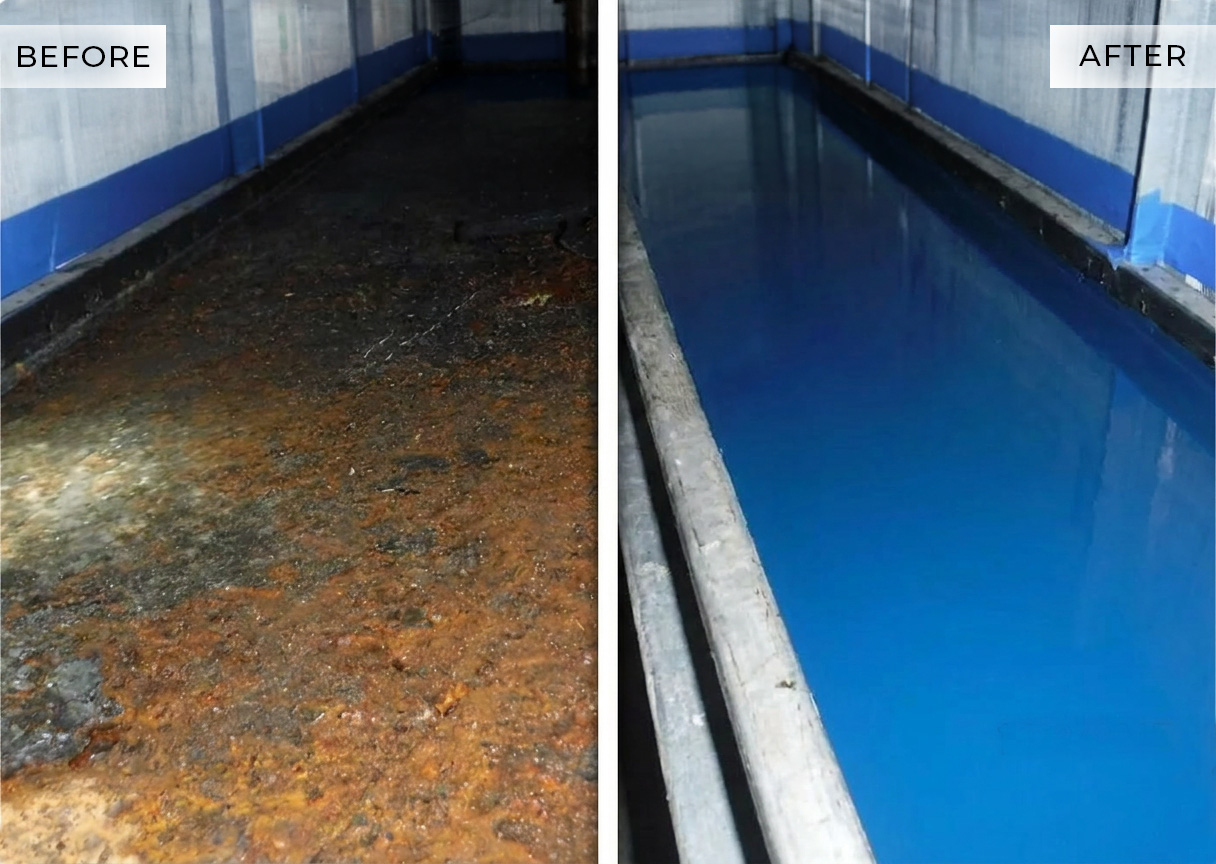
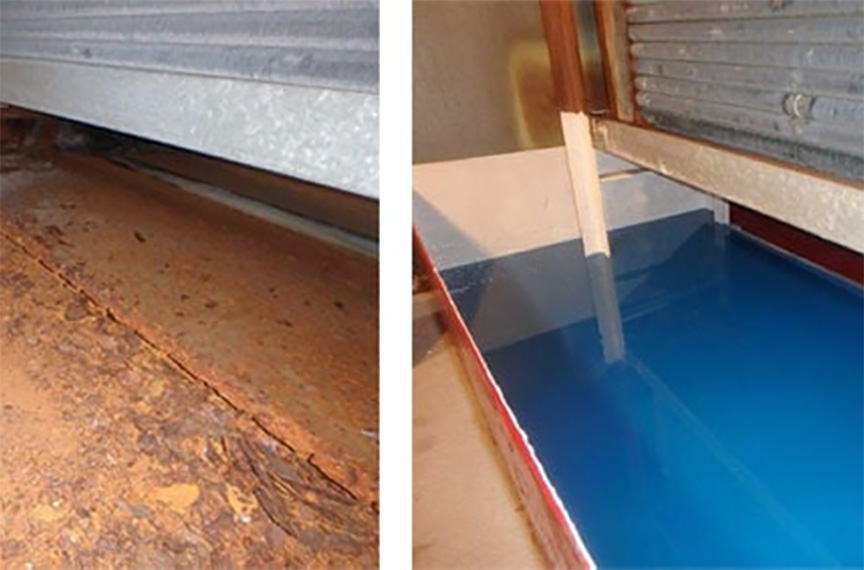
Restore Failing Drain Pans Without Replacement
Pancrete is a self-leveling drain pan resurfacer that pours over the prepared surface to fill pits, corrosion damage, and uneven areas, creating a smooth, durable new drainage surface inside the existing pan.
- Creates a smooth, self-leveling drainage surface.
- Creates a durable, chemical-resistant resurfacing layer.
- Cost-effective alternative to replacing damaged drain pans.
Product visuals

At a glance
Quick qualification for techs, facility managers, and distributor teams. Full details are in the spec sheet.
Temporary drain pan fixes do not last
Damaged condensate drain pans are often patched with paints, tars, liners, or temporary sealants that can break down, crack, or fail over time. Moisture, corrosion, cleaners, and standing water continue to attack the surface until leaks return. Pancrete was developed to create a new, durable drainage surface over the existing pan, helping restore function without costly replacement.

Key benefits
Focus on outcomes that matter to operators and maintenance teams: cleaner operation, preserved performance, fewer complaints, and less maintenance churn.
Restores the pan surface
Creates a new drainage surface over corroded, pitted, or uneven metal.
Helps stop leaks
Seals damaged areas that allow condensate to escape.
Self-leveling application
Flows across the prepared pan surface to help create a smooth, functional drainage path.
- Built to outlast temporary fixes: Designed as a durable resurfacing solution instead of a short-term patch, tar, or paint.
- Avoids costly replacement: Restores existing pans when replacement would be expensive, disruptive, or difficult.
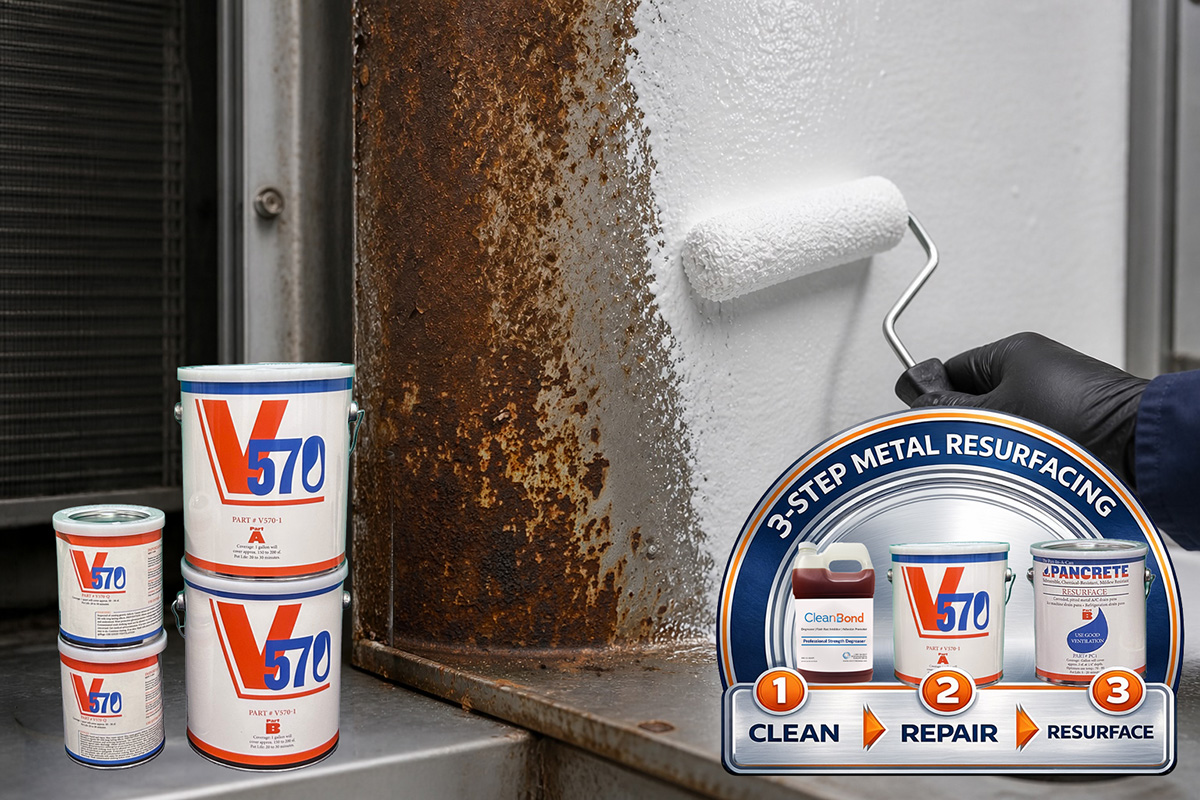
The Final Step in a Complete Drain Pan Restoration System
Step 1: Clean
Clean Bond removes oil, grease, and contaminants so the surface is properly prepared for restoration.
- Degreases and conditions metal
- Helps inhibit flash rust
- Prepares the surface for repair and resurfacing
Step 2: Repair
V570 seals cracks and pinholes while creating a protective barrier over damaged metal.
- Stops rust
- Seals surface damage
- Creates the repair stage before resurfacing
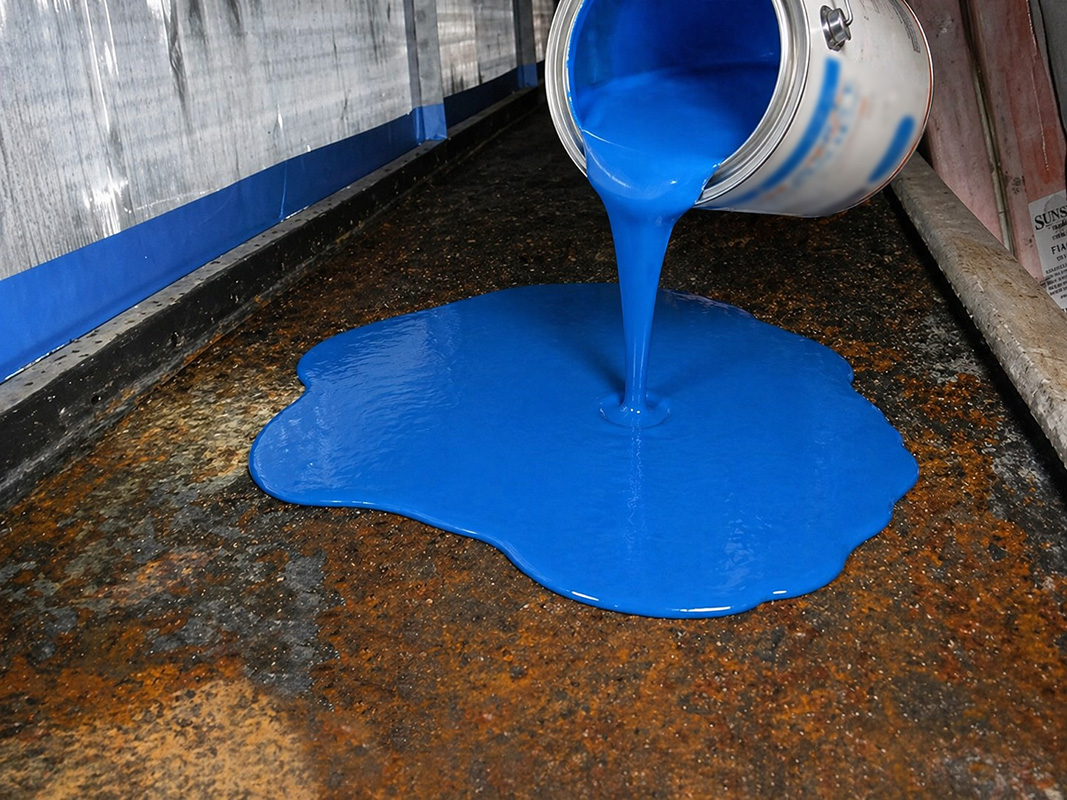
Step 3: Resurface
Pancrete pours over the prepared surface to create a smooth, durable, chemical-resistant drainage layer.
- Self-leveling drain pan resurfacer
- Restores drainage and helps stop leaks
- Completes the long-term restoration system
How it works
- Read the full technical instructions before beginning work.
- Complete all surface preparation before mixing Pancrete.
- Drain the pan and remove water or loose deposits with a wet vacuum.
- Wire brush or mechanically brush the surface to remove deposits and loose rust, then vacuum again.
- Tape small pinholes or cover larger openings with metal before pouring.
- Insert raised PVC at the drain opening to preserve drain height during the pour.
- Ensure ambient and surface temperatures are both above 70°F.
- Mix only one container at a time, immediately before pouring.
- Pour Pancrete over the prepared surface and allow it to self-level.
- If additional material is needed, mix the next container and pour it over the previous Pancrete layer.
- Wait 4–6 hours before returning the unit to service.
Ideal for damaged, corroded, leaking, or uneven HVAC condensate drain pans where replacement would be costly and restoration is preferred.
- Leaking condensate drain pans
- Corroded HVAC drain pan restoration
- Uneven or pitted pans that trap standing water
- Full restoration workflows with Clean Bond and V570